Discover the Red Flag Tricks for the Olympus Trip 35.
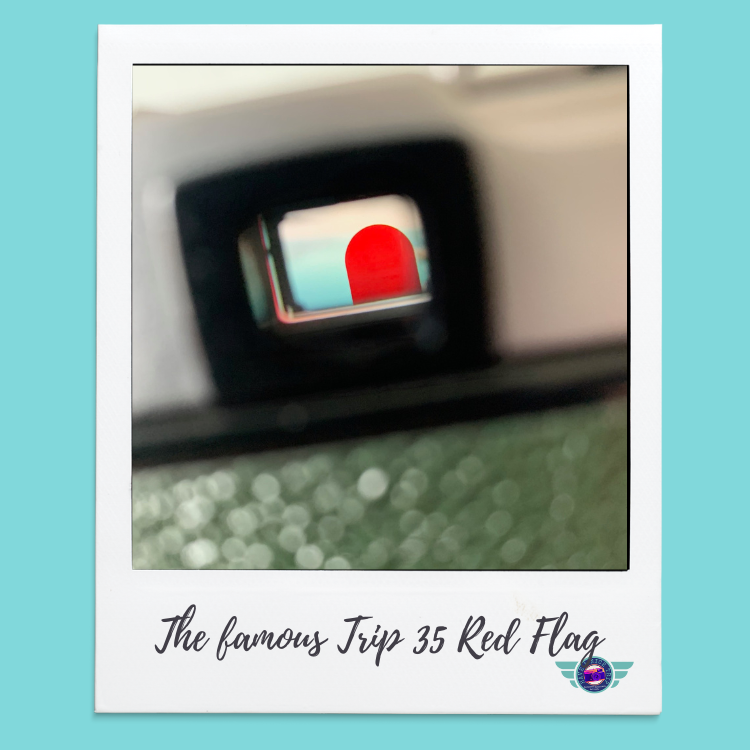
The “red flag” on an Olympus Trip 35 camera serves as an exposure warning system. For those that don’t know it is a little paddle shaped bit of red plastic that sometimes pops up in the viewfinder window. I’m not sure what the Japanese originally called it, but it is affectionately known today as the red flag.

This classic 35mm film camera, produced between 1967 and 1984, features a unique selenium cell-powered light meter and automatic exposure system.
The Red Flag is a critical component of proper camera operation. Here’s how the red flag works:
Light Meter Function: The camera uses a selenium cell light meter to measure the available light. This light meter doesn’t require batteries, as the selenium cell generates its own power when exposed to light.
Exposure Control: The Olympus Trip 35 has two shutter speeds: 1/40 sec and 1/200 sec. The camera automatically selects the appropriate shutter speed based on the light meter reading and adjusts the aperture accordingly within the range of f/2.8 to f/22 to ensure you get the right amount of light for the best exposure given the conditions.
Red Flag Mechanism: When there isn’t enough light for a proper exposure, the camera’s automatic exposure system activates the red flag. This red flag appears in the viewfinder, it pops up, indicating that the scene is too dark for a correct exposure at the current settings.
Preventing Underexposure: The red flag also locks the shutter release button, preventing you from taking a picture that would likely be underexposed. This ensures that your photos are not spoiled by incorrect exposure due to insufficient light. This is an important feature given the value placed on every shot you take.
In summary, the red flag on the Olympus Trip 35 is a built-in warning system designed to alert the photographer to low light conditions and prevent underexposed shots by locking the shutter when there’s not enough light.
Note of warning… over time when cameras have not been used regularly it is quite common for the red flag to become sticky, or stuck due to excess dirt and dust in the camera body. Also, the mechanism will not work if the aperture blades are also stuck or not moving freely. In this case the camera will need a clean and service to bring back to an as new condition again. Whilst servicing the cameras I sell I pay particular attention to the red flag mechanism and ensure that it works as it did when it left the factory.
Bypassing the red flag.
If the red flag on your camera is not working correctly, or you wish to have more manual control over the exposure settings, then you can bypass the red flag mechanism.
To bypass the red flag on the Olympus Trip 35 and take photos in low light conditions, you have two main options: using a flash unit or manually setting the aperture and shutter speed.
Using a Flash Unit.
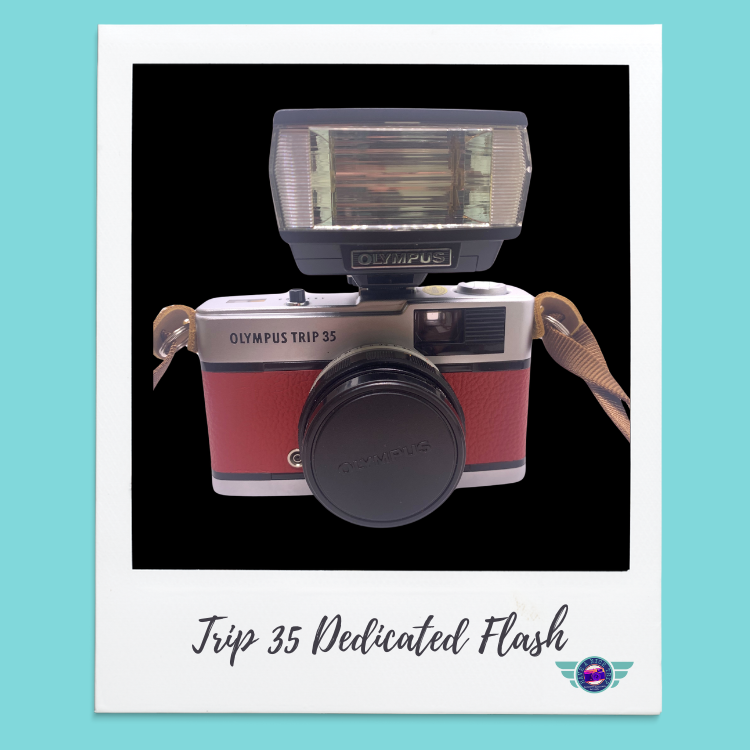
Attach a Flash: Mount a compatible flash unit onto the camera’s hot shoe. In my accessory shop, I have available original Olympus Flash Units and also the latest tech versions that have a similar retro look but are much lighter and faster at charging to flash status.

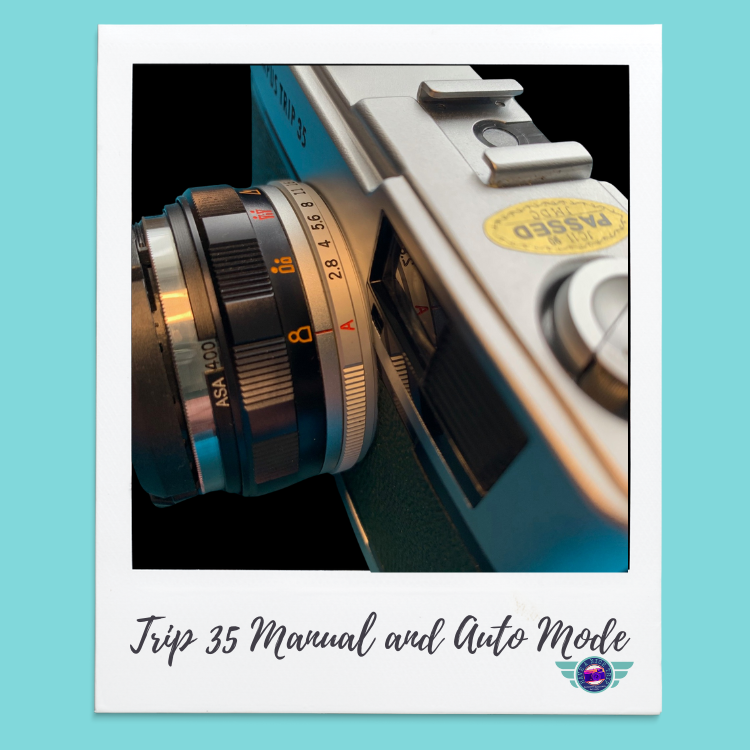
Switch to “Manual” Mode: Turn the aperture ring on the lens barrel from the “A” (automatic) position to a manual aperture setting (e.g., f/2.8 to f/22). Although, Olympus described this setting as a “manual system” – the selenium light meter still reads the available light and will close down the aperture from 2.8 if required. So in effect it is a semi-auto / semi-manual mode really.
- Set the Flash and Shutter Speed: The camera will default to a fixed shutter speed of 1/40 sec when using the flash. Ensure your flash unit is set to synchronize correctly with the camera, typically at 1/40 sec. You will need a steady hand when using this lower shutter speed or consider using a camera mount.
Adjust Aperture: Set the aperture according to the guide number of the flash and the distance to the subject. Refer to the flash unit’s manual or a guide number chart to determine the appropriate aperture setting.
Without Using a Flash Unit.
Switch to “Manual” Mode: Turn the aperture ring from the “A” position to a manual aperture setting.

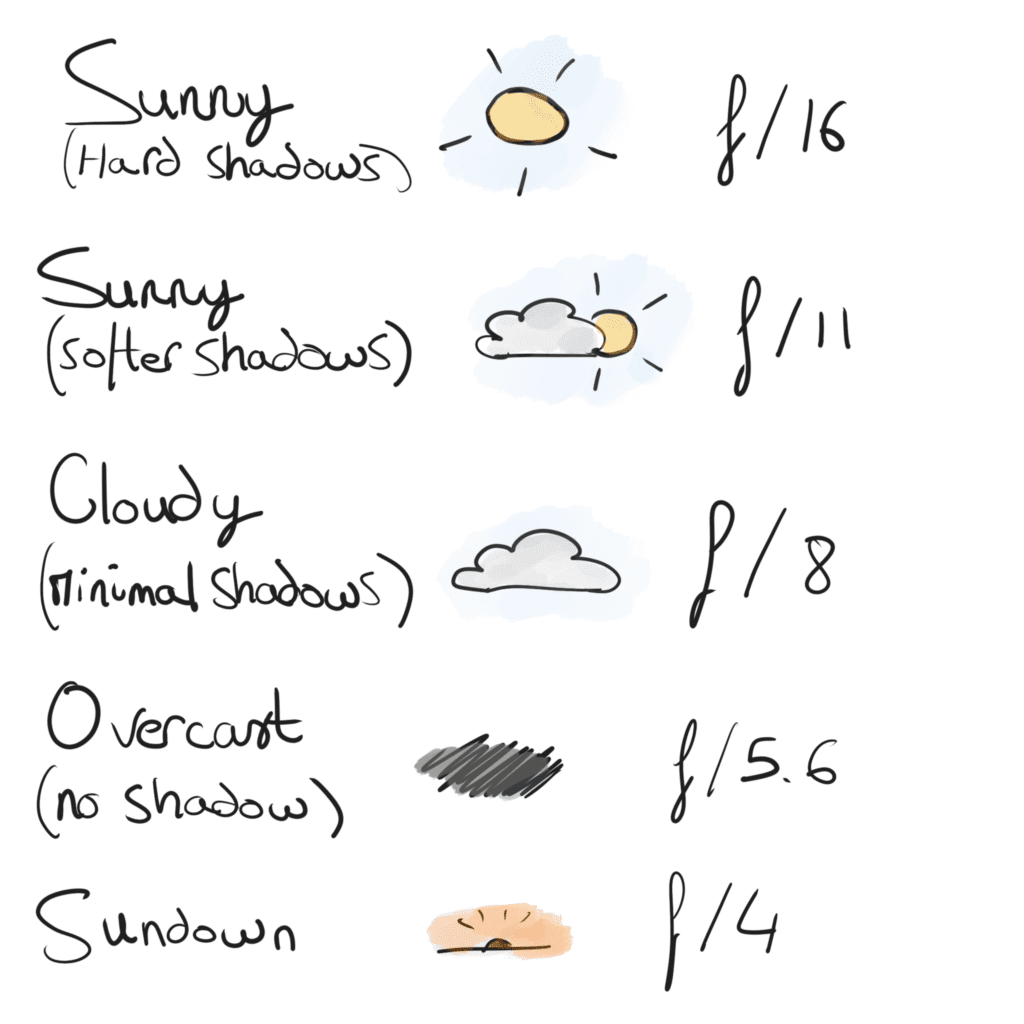
Estimate Exposure: The camera’s light meter is still working, even in this manual mode. So although the red flag won’t pop up using a f-stop setting, the light meter will close the aperture down further, intentionally, if it reads there is too much light for the f-stop selected. To check what the apertures are doing, compose your photo and half press the shutter to lock the light reading / aperture, turn the camera so you can see through the front lens and you will be able to see the size of the aperture it has selected – f22 smallest, through to f2.8 largest – so a guesstimate can be made. Use an external light meter, a smartphone app, or the Sunny 16 rule as a guideline for setting what you think is the best aperture, but just remember the light meter may close down further if required. There are some modified manual cameras that have been altered to work from f-stop on 200th shutter with no light meter… but feedback and reviews from users have not been that positive over the years.

Source: from Digital to Film Blog
By following these steps, you can effectively bypass the red flag mechanism on the Olympus Trip 35 and take photos in low light conditions, either with or without a flash unit.
Want to know more about the Olympus Trip 35? Check out our dedicated blog in honour of this iconic camera.


